
You have completed the step to create a new email address on your hosting account with us - congratulations ! Now you want to be able to access that email from your device, whether it's your mobile phone, computer, tablet...etc
The process here is very simple, the most important thing to remember here is the word IMAP. This is the email provider you will need to select on your device.
First, select the email client/app you currently use to access your emails to see the instructions:
- Add my email on the outlook app on my computer or phone
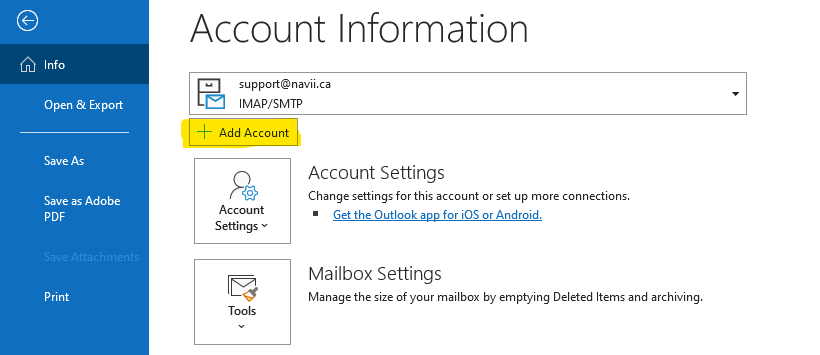
If you are on a computer, first click on the "File" menu tab located at the top-left corner of the outlook app. It should open the Account Information section, then click on Add Account as shown on the picture below :
The following page will open. Enter your email address and click on "Connect"
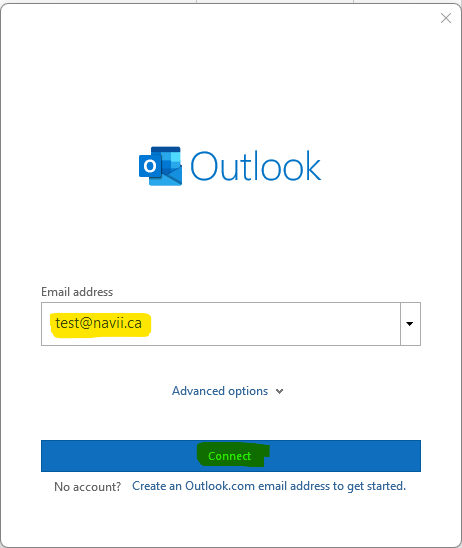
Next, select IMAP as the email client provider and enter your password to complete the process.
If you are on a phone, open the Outlook App, then click on the Home logo at the top-left corner of the app, then select the Outlook logo with the Plus Sign underneath.
It will list the available accounts to add, click Skip at the bottom if the account you want to add is not listed.
Then enter your email address and click Add Account
This is where it gets tricky. It will default to the Exchange mail client, you don't want that. You will need to click on "Not Exchange ?" at the top-right corner, then on Change Account Provider, and select IMAP.

You may be asked to enter the email configuration manually. If it's the case, use the following information by replacing the highlighted part with your domain name:
- Incoming Mail Server / host name: mail.yourdomain.com
Port Number : 993
- Outgoing Mail Server / host name: mail.yourdomain.com
Port Number : 465
- Username and Password : same as your email address and email password
- Encryption Method : SSL/TSL

If after following these instructions you still have problem, check that you are using the correct email/password, and ask your system administrator to confirm/reset. Once validated and it's still not working, feel free to reach out to us.
- Add my email on the Mail app on my iPhone or Mac
First go to the Settings area on your iPhone
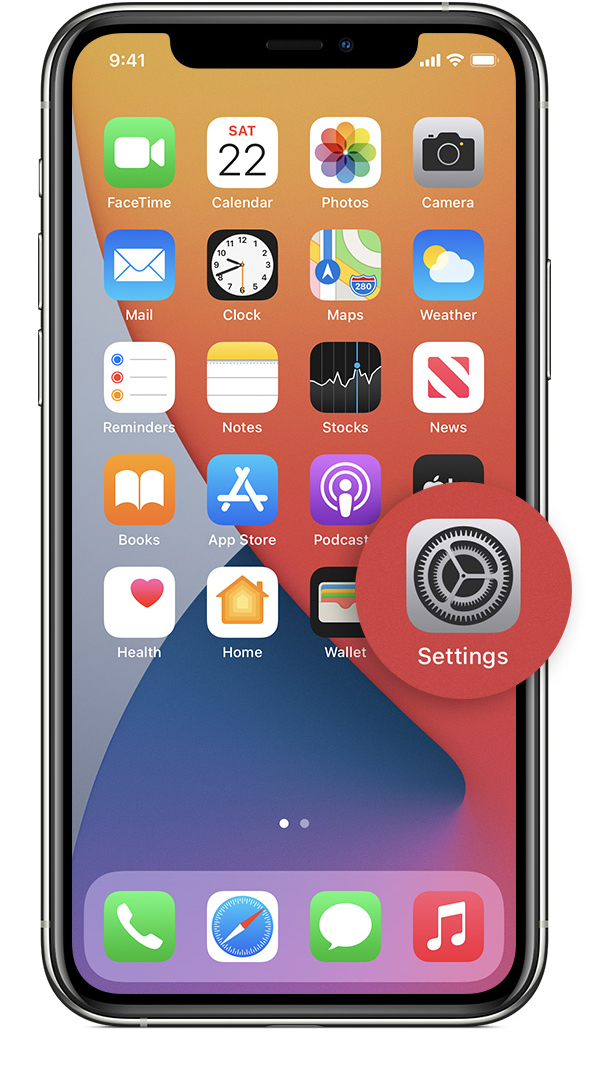
Then select Mail ==> Accounts ==> Add Account
In the email provider list, select Other, then select Add Mail Account
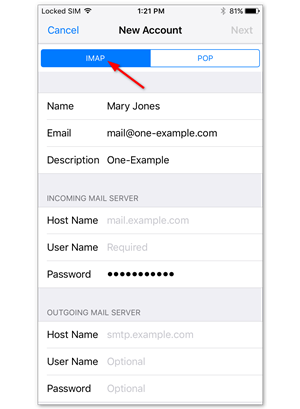
Fill in the information requested, then click Next
Make sure the IMAP tab is selected, and use the following information by replacing the highlighted part with your domain name:
- Incoming Mail Server host name: mail.yourdomain.com
Port Number if asked : 993
- Outgoing Mail Server host name: mail.yourdomain.com
Port Number if asked : 465
- Username and Password : same as your email address and email password
- Encryption Method : SSL/TSL
That's it, your email address has been added. You can now go back to the Mail app to see your email and start sending/receiving emails from this address.
- Add my email on the Gmail app on my phone or on the Gmail website
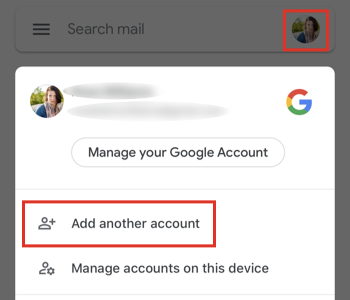
First open the Gmail app on your phone, or the Gmail website on your browser, and select your current account icon, then click on Add new Account as shown below
Next, select Other (IMAP) from the list of email providers
Enter your email address as requested
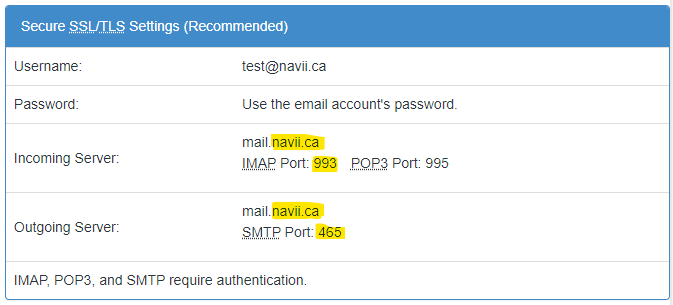
Then use the following information if requested by replacing the highlighted part with your domain name:
- Incoming Mail Server / host name: mail.yourdomain.com | Port : 993
- Outgoing Mail Server / host name: mail.yourdomain.com | Port : 465
- Username and Password : same as your email address and email password
- Encryption Method : SSL/TSL
That's it, your account is connected
Should you have difficulties following these information, please reach out to our support team at support@navii.ca, or open a ticket from the client portal.
